How to Set Staff Account Permissions on Shopify?
Posted on 2023-05-31 Updated on 2024-07-25
When adding users to your organization, you have the ability to grant
organization-level accesses. To allow users to log in to a store and make
changes, you must provide them with access to the store, along with the
necessary permissions to perform tasks within it. One convenient way to
manage accesses and permissions is by assigning roles to users. However,
before adding users, ensure that the required roles have been created.
If you grant users access to a store through the Shopify organization admin, they will become staff members of that store. Keep in mind that users who are invited from the Shopify organization admin won't appear in a store's Shopify admin until they accept their invitation and create an account.
When you create staff members from your store's Shopify admin, you can conveniently manage those users through the Shopify organization admin. Keep in mind that until they accept their invitation, users who are invited directly from a store will appear as separate entries in your Users list. However, once they accept, their entries will be merged into a single user in your list.
Let’s introduce you to some easy steps involved in creating user permissions on shopify:
Step 1: Choose the Account
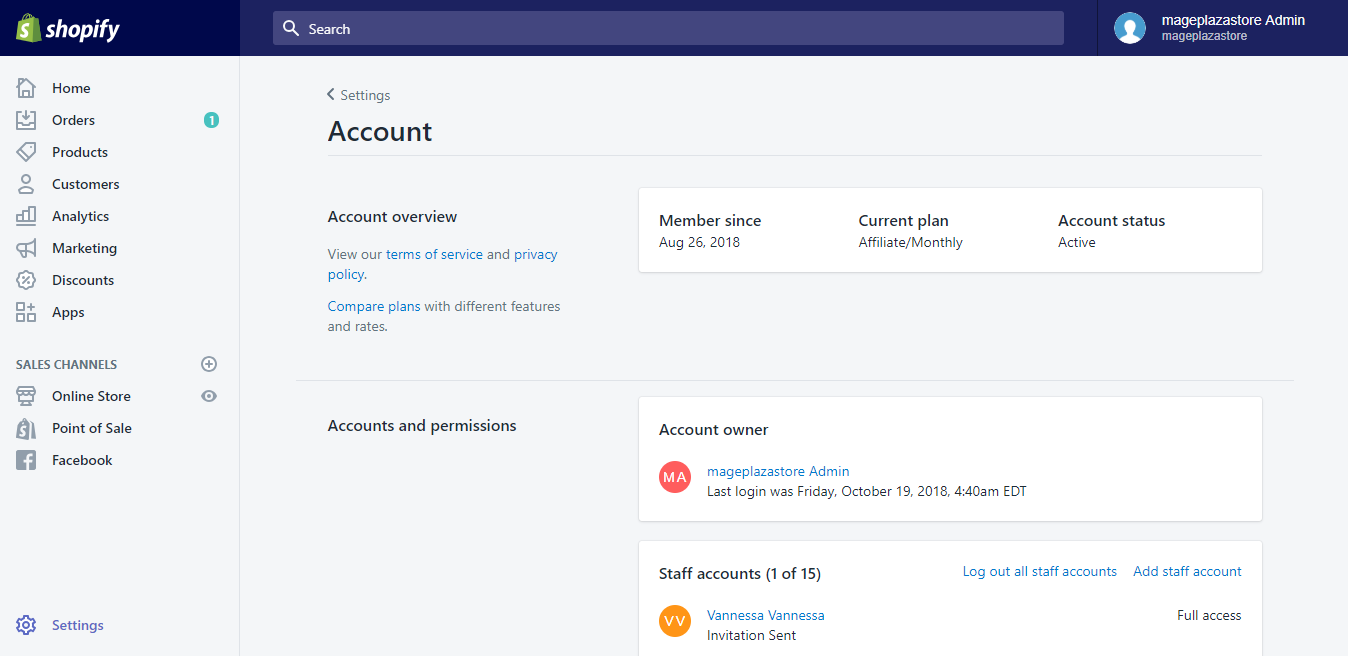
To access the settings on your page, navigate to the bottom left corner. Locate and select the "Settings" button. Next, within the Shopify admin interface, click on the "Account" option.
 Step 2: Choose Staff Member
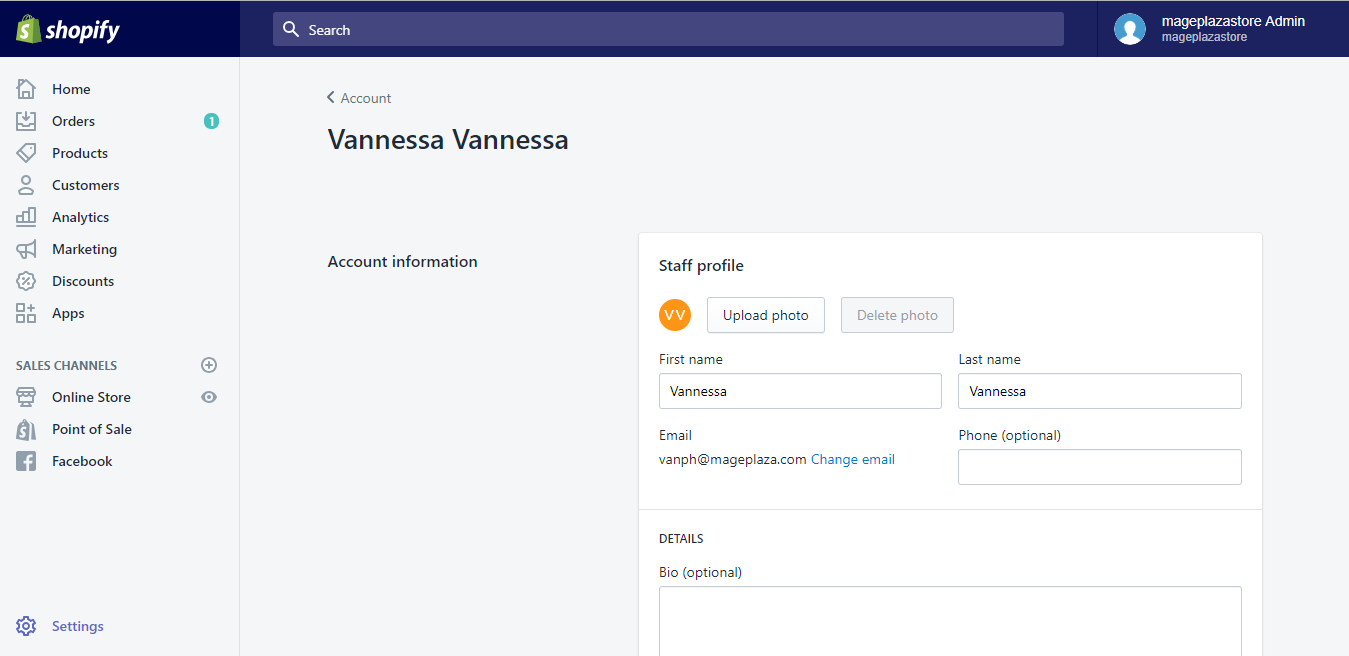
To view the account details of a specific staff member, go to the "Accounts and Permissions" section, which contains all the staff members' accounts. Simply click on the name of the staff member, and their account details will be displayed.
 Step 3: Full Permission
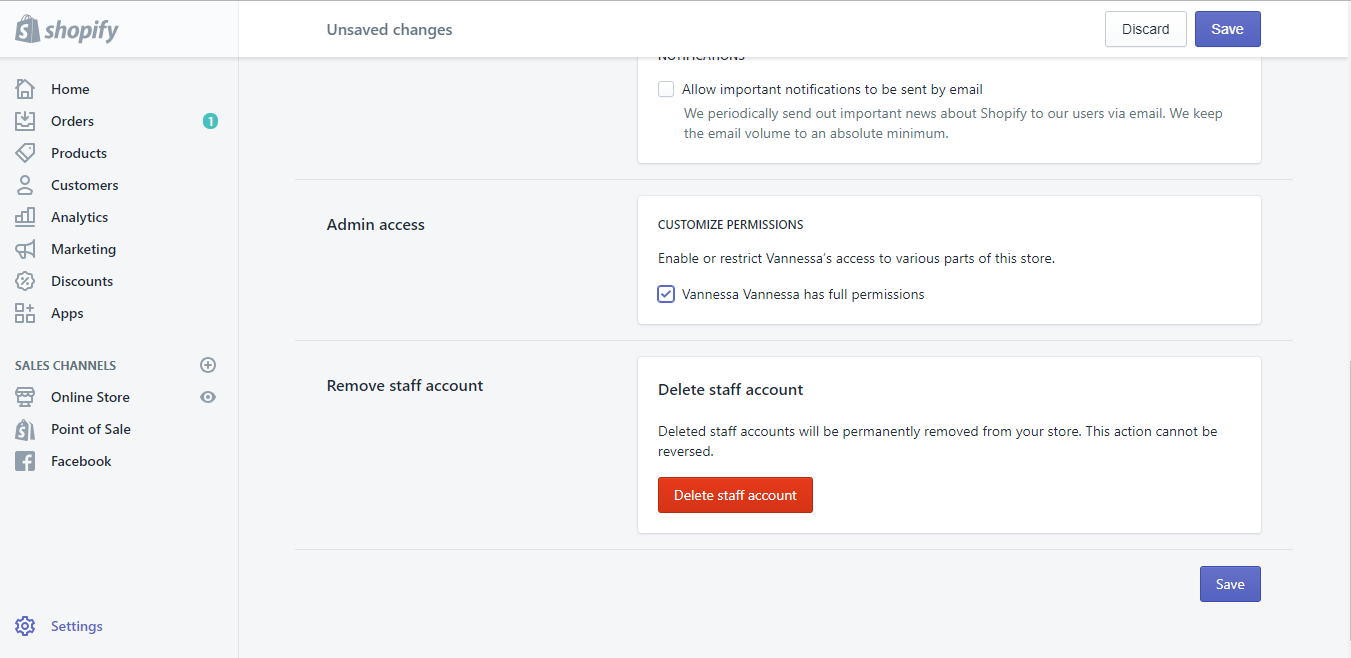
Now, scroll down to the admin access section. After that you will see a checkbox just next to the staff member has full permissions. You have to uncheck it to remove the full permission of the account.
 Step 4: Choose Permissions
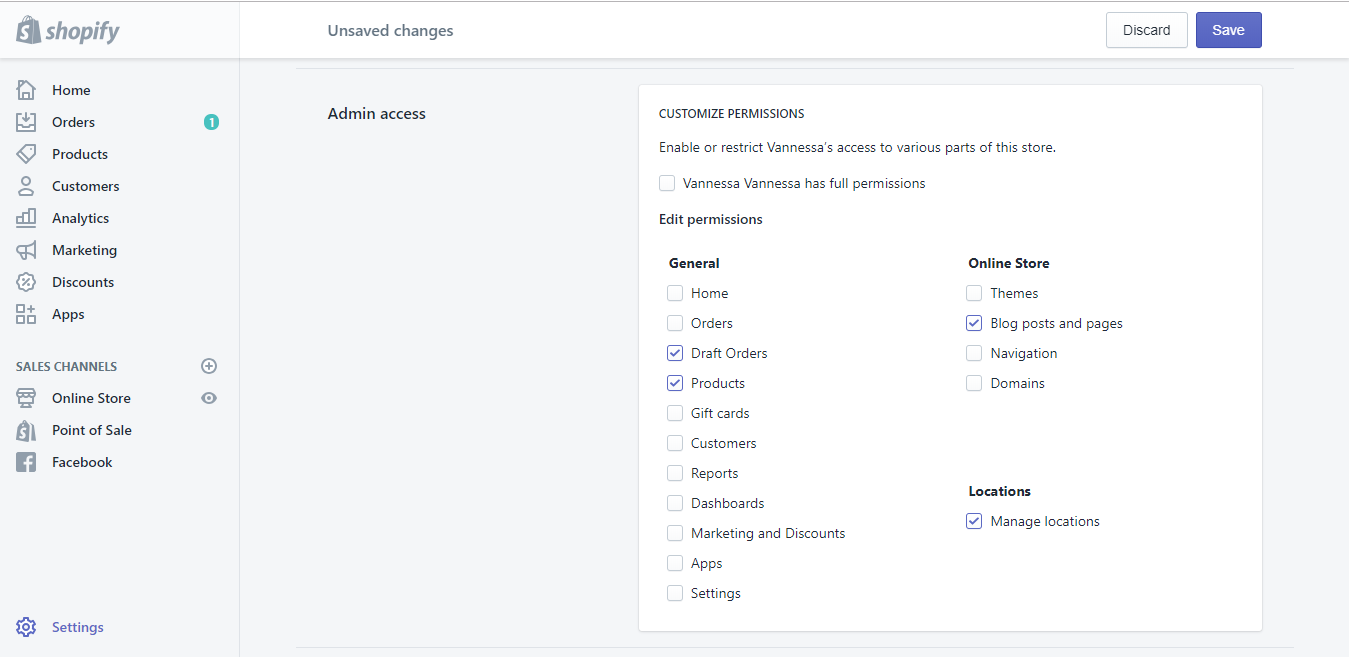
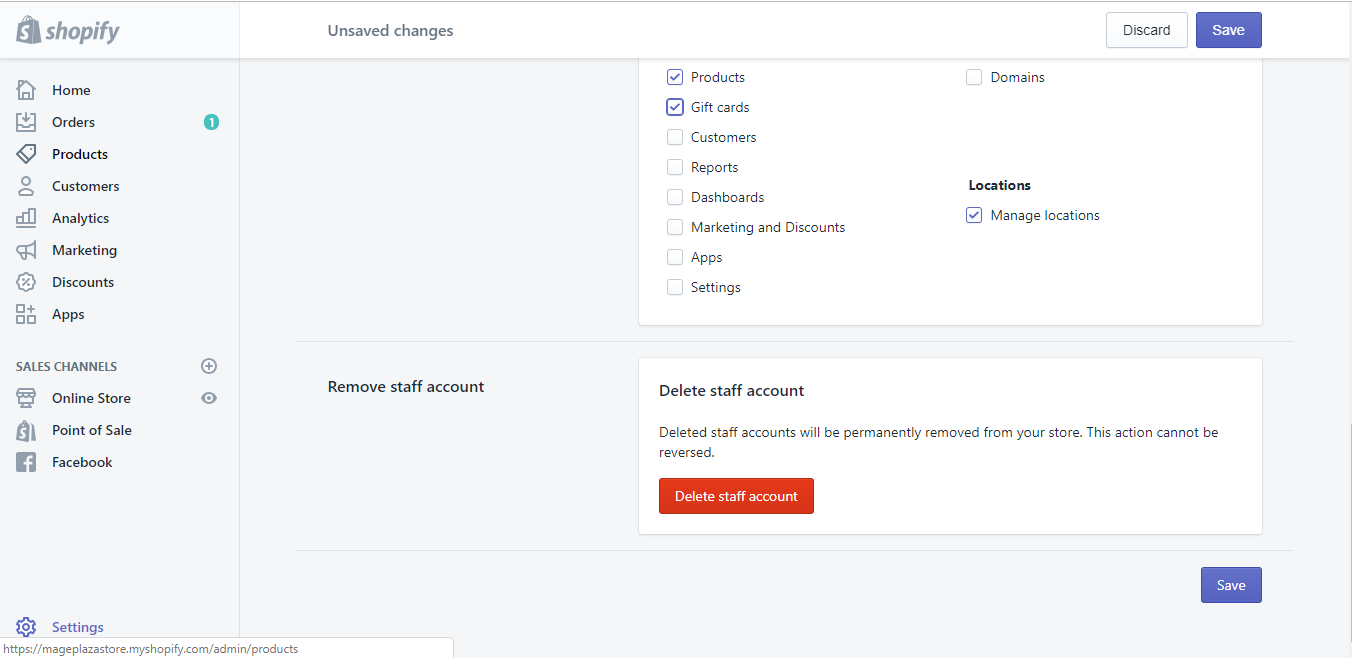
Once you have unchecked the "Staff member has full permissions" box, a pop-up window titled "Edit permissions list" will appear. In this window, you can select the specific permissions you want to grant the staff member by clicking on the checkboxes next to each permission. Choose all the permissions you wish to provide them with access to.
 Step 5: Click Save
To ensure that your changes are saved, click on the Save button. This button can be located in the bottom right corner of your page or at the top right of your page. Be sure to confirm your changes by clicking on this button.
Upon successful invitation, your newly added user will be listed as Pending in the user database. Once they accept the invitation, their status will be changed to Active automatically.
 These simple steps provide an answer to the query of setting staff account
permissions on Shopify. By implementing the aforementioned instructions, you
can efficiently manage your Shopify ecosystem with ease.
Found this article helpful?
[ 5 Out of 19 Found Helpful ]
